RSS

Category Archives: My recipes

Lactic sourdough bread

107.jpg

Lactic sourdough bread:  I call this loaf  ” lactic sourdough”

because this loaf has full of lactic acid. lactic food.PNG

I treat my sourdough starter as levain. You can read how I made my sourdough starter from scratch just using flour and water here.

Ingredients:   To make two loaves.

Levain   315g  ( My dough hydration is about  68-70% )

Final dough

KA AP   810g    * King Arthur All purpose flour

Freshly ground Rye berry seeds  50g

Vital gluten  8g

Water ( Spring water is the best)  526g +

Instant yeast  1-2 g  * No need to add the yeast in the summer.

Salt  19g


  1. Mixing  Add all the ingredients to the mixing bowl except the salt.
  2. Mix until incorporated, then leave it for 5 minutes.
  3. Add the salt and knead until the dough have a moderate gluten development.
  4. Bulk fermentation: 3-4 hours until the dough rises triples.
  5. In 45 minutes,  Folding: Stretch and fold the dough on the surface once after 45 minutes of bulk fermentation.
  6.  Dividing and shaping:  Divide the dough in the half and shape.
  7. Final fermentation: Approximately 1 -2 hours at 76F.
  8. Baking : preheated at 280F,  increased the temperature to 430F as soon as you place the dough in the oven, put the metal wire underneath the bread, continue to bake for 10 minutes at 430F. Decrease the temperature to 400F, bake another  5-10 minutes until golden browned.007

014.jpg

I have used this knife since 2010, and it has still worked as new yet.

Victorinox Swiss Army 10.25 Inch Fibrox Pro Curved Bread Knife with Serrated Edge


Happy Baking!

koubo

 
4 Comments

Posted by on April 19, 2017 in Lactic sourdough bread, My recipes


Tags: ,

Olive bread with raisin yeast water

Simply I like this bread . It tastes so good with nice aroma.

Although It took quite some time until I tried because I couldn’t have a good image of the bread with lots of olives.

Some People at Freshloaf.com intrigued me to make this bread, then it became one of my favorite breads.

044

Ingredients :  approximately 2 loaves

olive bread with raisin yeast water

* use pitted olives.

019

Method:

1. Mix the levain  and ferment it for 12 hours at the room temperature.

After 12 hours: the dough rose tripled.

007

2.Next morning: Mix thoroughly  the levain and the final dough ingredients except the salt and olives  leave it for 30 minutes at the room temperature ( Autolyze).

017

3. Add the salt and olives. knead the dough on the surface until it gets elastic for 5-6 minutes. The dough temperature – 70F after kneading.

*you feel your dough is fermenting while kneading because the dough gets gassy.

021

023

4. Bulk fermentation and * Folding:  1.5-2 hours.    It rises faster when it is with instant dry yeast.   I prefer put a bit of instant dry yeast for this bread to make softer and lighter texture.  If you don’t put any instant dry yeast, it will take longer to wait.


*Folding: Stretch and fold the dough on the surface only 1 time after 45 minutes of bulk fermentation.


*↑ these dough are NOT with olives. These pictures are to show you how to fold the dough.

027

↑This is with olives.

5.Preshape and bench time: Preshape lightly into a round ball and rest the dough at the room temperature for 30 minutes.  You can upside down the bowl that the dough was fermented to cover the dough for the bench time.

6. Shaping:   I will post it how to shape into an oval shape as soon as I take pictures of the process.

7. Final proof  ( with retarding for 2 hours.) and  Preheat 465F :  About 1 hours at the room temperature around 70F.   Please watch the dough when it is ready to bake.  I don’t think a finger test is reliable.  It didn’t work for me.  I am still thinking about the dough how to determine the timing.

9. Scoring and baking: Bake at 465F for 12 minutes with the stainless bowl. Take the bowl out and lower the oven temperature at 425F  and bake more 8 minutes, then lower the oven temperature at 400F and put *a cooling rack under the bread and  bake more 25-30 minutes until golden brown.  *  I use the cooling rack while baking loaves because I don’t like the bottom of loaves burned.

* My oven is too weak to use such a high temperature. I wish I could..  So my loaves are kind of pale sadly, but they are still tasty!

040

Happy baking!

Creative Commons License
Koubo by Akiko is licensed under a Creative Commons Attribution 3.0 Unported License.


Tags: , , , , , , ,

Japanese sandwich loaf with raisin yeast water

I probably made this loaf more than 70 within a year, and now I make it once a week at least.  I am always happy to have this loaf, which is just like the one used instant yeast, but doesn’t have yeasty brewer smell, which I really don’t like.

Japanese sandwich loaf with raisin yeast water

Mountain sandwich loaf

  Standard sandwich loaf

You can click on the PDF↓ to see in a larger size.

Method:

1. Make the levain:  Mix them thoroughly and leave it at the room temperature at 24℃/75F for 12 hours. It will rise tripled in volume by the next morning.

2. Mix the final ingredients except the saltAutolyze( leave it at the room temperature) for 30 minutes.

I highly recommend to use the way to have good crumb.

3. Add the salt and  knead  until the gluten developed ( Pass a window pane test )for about 20 minutes by hand, Or try my kneading method that I linked above.

Example: take a look at these crumb.

4. Bulk fermentation :* 3-11 hours at 24-26℃ /75F-78F  around. ( 2.5-3 times in volume) colder temperature in the summer,warmer temperature in the winter.

* Note: This is not about the time, it is all about how much your dough rise before you preshape the dough.  If your dough is very slow to rise, just wait until it is ready.  Long bulk fermentation makes flavorful bread.

5.Preshape & shape:  For a standard sandwich loaf .  For a mountain sandwich loaf.

* I like the Standard sandwich loaf shape  better than the mountain sandwich loaf ‘s  for levain bread because  the mountain sandwich loaf  is given a lot of pressure to the dough during the shaping and the dough gets tougher, therefore, the texture is like eating cotton candy ( shredding ) because natural yeast doesn’t have strong yeast as much as commercial yeast .

.

6. Proof   About 2 hours at 28℃ /82F until the dough rises little over the top of the tin.  If you don’t want any sour flavors to your loaf, Don’t proof your dough over 2 hours!  I bake it in 2 hours for non sour sandwich loaf.

If your dough is slow to rise, it may be good to retard it as long as you like sour bread. But, please read ” Warning about retarding a sandwich loaf” at the end of the post.

7. BakeNo need to preheat :

1) Spray water 2-4 times around the wall of the oven and place the loaf pan into the oven.

2) Set up 284 F and bake  for 20 minutes.

3) Set up 410F and bake for 15 minutes.

4.Rotate the loaf  180 degree and bake 10 more minutes until golden brown.

More detail about “ Cold oven ” method.

Standard loaf /Cold oven method

For preheated oven method:  Preheat 410F  and bake for 20 minutes at 410F.  Rotate 180 degree the loaf pan, bake more 15 minutes.   Place the loaf on a oven rack until completely cool.

This crumb and crust are really soft.  I don’t taste raisins at all, that I really like just like a regular sandwich bread.

Creative Commons License
Koubo by Akiko is licensed under a Creative Commons Attribution 3.0 Unported License.


Tags: , , , ,

Rustic bread with raisin yeast water Ⅱ

After I posted ” Rustic bread with raisin yeast water Ⅰ“,  and I really like  the one with instant yeast, which is more like Jefferey Hamelman’s Pain Au levain as our daily sandwiches. Especially my 5 year old daughter who likes only white bread is fond of the bread, even it has sour flavor.

But I wanted to make the one without instant yeast.  I started to think of converting sourdough starter to raisin yeast water and I made 16 loaves without instant yeast to fit into the rustic bread with raisin yeast waterⅠwith instant yeast water, and  I finally made it.

Rustic bread with raisin yeast water Ⅱ

You can click on the PDF↓ to see  in a large size.

Method:

1. Mix the levain  and ferment it for 12 hours at the room temperature.

After 12 hours: the dough rose tripled.

2.Next morning: Mix thoroughly  the levain and the final dough ingredients except the salt and  leave it for 30 minutes at the room temperature ( Autolyze).

3. Add the salt and knead the dough on the surface until it gets gassy and elastic for 5-6 minutes. The dough temperature – 70F after kneading.

4. Bulk fermentation:  About *7 hours until the dough rises close to tripled.

* Note: This is not about the time, it is all about how much your dough rise before you preshape the dough.  If your dough is very slow to rise, just wait until it is ready.  Long bulk fermentation makes flavorful bread!

Folding: Stretch and fold the dough on the surface only 1 time after 45 minutes of bulk fermentation.


After 4-5 hours: it rose close to tripled.

5.Preshape and bench time: Preshape lightly into a round ball and rest the dough at the room temperature for 30 minutes.  You can upside down the bowl that the dough was fermented to cover the dough for the bench time.


6. Shaping:   I will post it how to shape into an oval shape as soon as I take pictures of the process.

7. Final proof  (retarding):  Ferment the dough at the room temperature for 30 minutes until the dough started to lose the shape. And Retard the dough for overnight ( keep the dough in the refrigerator). Next morning: proof at the room temperature at 65-70F for 1 hour or so.

8. Final proof (without retarding) and  Preheat 465F :  About 2 hours at the room temperature around 70F.   Please watch the dough when it is ready to bake.  I don’t think a finger test is reliable.  It didn’t work for me.  I am still thinking about the dough how to determine the timing.

* I use a big stainless steel bowl to make steam.  The stainless steel bowl should be preheated before baking, too.

9. Scoring and baking: Bake at 465F for 12 minutes with the stainless bowl. Take the bowl out and lower the oven temperature at 425F  and bake more 8 minutes, then lower the oven temperature at 400F and put *a cooling rack under the bread and  bake more 25-30 minutes until golden brown.  *  I use the cooling rack while baking loaves because I don’t like the bottom of loaves burned.

Score the dough as you like…  I didn’t a good job on the scoring.

Take  the hot stainless bowl out of the oven at first, and slide the dough into the oven and put the hot stainless steel bowl back into the oven USING YOUR GLOVES THAT DON’T SLIP when you hold it.

   The crumb is as soft and fluff as the rustic bread with raisin yeast waterⅠ with instant yeast water.

This bread tastes sour very gradually whenever I chew.  The mild sourness remains at the end of eating with wheat aroma.  Very nice bread.

Creative Commons License
Koubo by Akiko is licensed under a Creative Commons Attribution 3.0 Unported License.


Tags: , , ,

Rustic bread with raisin yeast water Ⅰ

I have tried to make sourdough bread with raisin yeast water without sourdough using Jump Start to have sour flavor for a month. I was wondering if I could make sourdough bread.  I can make non sour sandwich bread or bagels or English muffins with raisin yeast water because I use a lot of raisin yeast water for these levain.  What if I use a little amount of raisin yeast water for the levain?

Rustic bread with raisin yeast water

you can click on it↓ if you can’t read well.

* When I used 1.8% salt as to 100% flour including preferment flour to make this bread that was retarded, I tasted little bitter than the original one.  I also made this bread without retarding with 1.6% salt as to 100% flour including preferment flour. It tasted right, too.   It is up to your taste.

Method:

1. Mix the levain  and ferment it for 12 hours at the room temperature.

After 12 hours: the dough rose tripled.

2.Next morning: Mix thoroughly  the levain and the final dough ingredients except the salt and  leave it for 30 minutes at the room temperature ( Autolyze).

3. Add the salt and knead the dough on the surface until it gets gassy and elastic for 5-6 minutes. The dough temperature – 70F after kneading.

4. Bulk fermentation:  About 7 hours until the dough rises close to tripled.

* Note: This is not about the time, it is all about how much your dough rise before you preshape the dough.  If your dough is very slow to rise, just wait until it is ready.  Long bulk fermentation makes flavorful bread! 

Folding: Stretch and fold the dough on the surface once after 45 minutes of bulk fermentation.


             After 7 hours: it rose close to tripled.

5.Preshape and bench time: Preshape lightly into a round ball and rest the dough at the room temperature for 30 minutes.  You can upside down the bowl that the dough was fermented to cover the dough for the bench time.


6. Shaping: 

Stretch the dough into a square gently..

Make a letter fold..

Another letter fold..

And  make a round ball with your both hands..

Place the dough into the banneton and put it in a bigger plastic bag to proof..

7. Final proof  (1):  Ferment the dough at the room temperature for50-60 minutes until the dough started to lose the shape. And Retard the dough for overnight ( keep the dough in the refrigerator).

8. Final proof (2) and  Preheat 465F : Move the dough to the room temperature ( colder place around 67 F) and ferment the dough for 2 hours around. I would bake the dough before the dough gets sticky. It will be difficult to remove the dough from the banneton.

* I use a big stainless steel bowl to make steam.  The stainless steel bowl should be preheated before baking, too.

 The dough doesn’t  rise much but it will be fine.

9. Scoring and bakingBake at 465F for 12 minutes with the stainless bowl. Take the bowl out and lower the oven temperature at 425F  and bake more 8 minutes, then lower the oven temperature at 400F and put *a cooling rack under the bread and  bake more 25-30 minutes until golden brown.  *  I use the cooling rack while baking loaves because I don’t like the bottom of loaves burned.

Score the dough as you like…

Take  the hot stainless bowl out of the oven at first, and slide the dough into the oven and put the hot stainless steel bowl back into the oven USING YOUR GLOVES THAT DON’T SLIP when you hold it.

About the taste1st day: remaining some sweet,but little sour. The sourness reminds me of Apple cider vinegar.

2nd day: little sour at the end after eating. No more tasting the sweetness that I tasted on the first day.

3rd day: Sourer . I tasted sour while eating, but it is very pleasant as much as my 5 year-old daughter enjoyed it. because it has more complex flavor than the sourness.

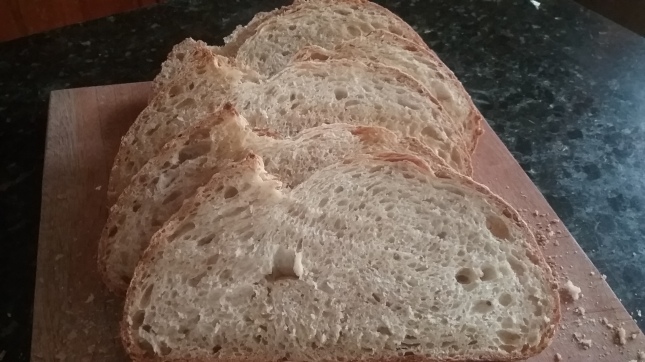
Very moist ( Not  wet  dough)and light and soft crumb.  The crust was  harder than the one that I baked without retarding, but the crust on the top was very thin and crispy.

This dough acted like Tartine’s country bread and the taste was like the miche that David posted on TFL, but this crumb was softer.

————————————————————————————————————————-

The pictures of  the loaves were used instant yeast. I added 0.3% instant yeast as to 100% total flour including preferment flour. I didn’t retard it.

Bulk fermentation : about 2 hours until the dough rise tripled and the final proof : 50 minutes around.

I gave this loaf ↑to my daughter’s school bus driver as a gift. She told me that the bread was the best bread that she ever had. I am so happy that she enjoyed as much as she ate this bread “Breakfast” ” Lunch” and ” Dinner” on the day. That made my day.

We enjoyed the loaf as much as the loaf that was retarded. These loaves were  also very light too.   The crust was very crispy and thin and the crumb was very soft and fluffy, but it had nice volume.  I tasted sour very slightly, which I was looking for this loaf.

Creative Commons License
Koubo by Akiko is licensed under a Creative Commons Attribution 3.0 Unported License.


Tags: , ,

Bagel with raisin yeast water

I have worked on this bagel for a long time until now.  I have a strong thought on Bagel that I really care for.   The crumb should have strong volume not soft one. I used to stomp the dough using my feet to knead the dough because the dough is tough.  But now, I use a food processor to knead the dough, which is easier for me to work with.

Bagel with raisin yeast water

Ingredients:

Levain :

  • 107g  raisin yeast water ( The raisin yeast water should be rested in a refrigerator for a day after making or refreshing)
  • 134g  King Arthur bread flour

* Mix them all and ferment it at the room temperature for overnight. The levain rose tripled in 12 hours.

Final dough:

  • 134g cold water (  Ice cold water in the summer )
  • 400g King Arthur bread flour
  • 16g  honey
  • 6.9g salt  ( I use sea salt )

* Some molasses – For boiling water.

Method

1.  Mix all the ingredients except the salt, and 5-10 minutes later, you can add the salt.

* if you use ” Autolyze” for 30 minutes, the bulk fermentation time would be shorten.

2. Divide the dough in a half to knead  by a food processor. I hit ” Pause” several times to soften the dough for 40 seconds each.  

3.  Let the dough rest on the surface for 5 -10 minutes. The dough should be covered with plastic wrap.

4. Repeat No.2 again to knead the dough by a food processor.

5. Put the dough together in one piece on the surface. 

6. Divide it into 7 pieces. Around 112-113g each.  I  make a round ball kneading the dough. the dough is tough.

7. Bench time: Cover the dough with a saran wrap or damp cloth for 15 minutes.

8. Shape:

Using a rolling pin, make a long oval shape.

          Roll the dough very tightly..

Using both hands, stretch the dough to make a long string..

Close the seam very well and flatten the one side..

Cover the other side with the flatten side..

And pinch very well..

Using both hands, make a good circle for your bagels

9. Proof  :  Cover the bagel dough with plastic wrap and proof at the room temperature for 2-3 hours until you pass the this test:       Put a bagel dough in water, and it floats right away, the dough passes the test. So you can bake the bagels now.

10. Boil the water and dipping the bagel dough:  Pour some water just enough cover the bagel in a pan and pour some molasses and boil the water.   Preheat the oven at 410 F.

 20 seconds for one side, another 20 seconds for other side to cook.

11. Place the bagel dough on the clothes or paper towels to drain the excess water. and sprinkle some topping that you like

12. Bake   16 minutes at 410 F until golden brown.

* For the bagels with toppings: Flip them over so that  the topping side should be on the bottom and bake them at 410F for 3 minutes, then open the oven and flip them over again that the topping side should be on the top now and bake them fro 13 minutes until golden brown. ****This method makes the both side’s crust equal and thin, and the topping will stick on the bagel.

My daughter made a funny bagel that is on the right.

This bagel is sweet and the  taste has more flavor from the levain.

I use some whole wheat flour in the levain to make whole wheat bagels sometimes. But my kids prefer this bagels to the healthier ones.

Creative Commons License
Koubo by Akiko is licensed under a Creative Commons Attribution 3.0 Unported License.

 
8 Comments

Posted by on January 4, 2012 in Bagel, My recipes, Raisin yeast water bread


Tags: , ,

Japanese sandwich loaf ( quick bread)

The best way to eat this sandwich loaf  is toasted. It is very light and slightly sweet.

Japanese sandwich loaf   ( 1 loaf)

Standard sandwich loaf

Mountain sandwich loaf


My  Pullman size:23cmx10.5cmx10cm

Ingredients:                                                                              Bakers %

  • 90 g King Arthur bread flour                                 23.7 %
  • 290 g King Arthur All purpose flour                   76.3 %
  • 4 g instant dry yeast                                                      1 %
  • 19 g sugar                                                                       5 %
  • 19 g shortening                                                             5 %
  • 120 g water                                                                    31.6 %
  • 83 g milk                                                                          21.8 %
  • 1 large egg ( Approximately 50g)                          13.2 %
  • 6 g salt                                                                                1.58%

——————————————————————————–

Total  681g                                                                                   179.18%

Method:

1. Mix the flour, yeast, sugar, and add the salt at the last, then mix it well.

* If you have a stand mixer to knead the dough, I will recommend this method.

2. Add all the ingredients in the dry ingredients and mix.

64b695d77d17b13bbe28d68ecdaa8f583. Knead until you pass the windowpane test for 20 minutes.
4. Bulk Fermentation: Ferment the dough in the container that is coated with shortening or oil for 1.5-2 hours at the room temperature. The dough will rise 2.5 times in bulk at the end of the fermentation.
5. Preshape and Shape : For a mountain sandwich loaf
  For a standard sandwich loaf:
    Preshape :
  1 ) Make a round ball on the work bench after taking out the dough from the container.
  2) Bench time:   Cover the dough with a damp towel and  rest for 30 minutes.
 3 )Shape:   Very lightly flour ( I use 50% rice flour / 50% King Arthur All purpose flour mix)  the work surface, press and flatten it gently using a rolling-pin to make a rectangle. The width should be less than your loaf pan’s width like the picture below. Otherwise, you can’t  fit the dough in your loaf pan when you mold!                                                                       
4) Roll the dough from your side.    *Not too tight and not too loose when you roll the dough so that there is no excess air in the dough.
5) Pinch the end of the dough. 
                                                                        
     If you pinch all the seam, you will have a loaf like this!
* Point:     Take a look these pictures. I made 2 loaves in the same time, but I shaped it differently.
   The left picture is overstated.
                                                    * The bread on the right has a big hole around the top.
6) Mold the dough in your loaf pan: The seam is on the bottom.
6. Final proof:   Proof  the dough at 82 F for 1.5-2 hours until the dough rises  3/4 inch over the top of the Pullman.
7. Bake :   Preheat 438F .  Reduce the temperature to 400-410 F  and bake  for 30 minutes,  or  use ” Cold oven” method.    Brush some melted butter on the top of the loaf when it is baked.

Creative Commons License
Koubo by Akiko is licensed under a Creative Commons Attribution 3.0 Unported License.


Tags: , , ,

Sesame bread ( Goma shokupan)

I have baked this loaf over and over to get my daughter who only likes white bread says ” Yummy”.   I finally heard some good words from her who said, ” It is good! Can I have more?”   That made me really happy.

This formula is adapted from the book ” Coupe Junkies” which was published by 2 Japanese home bakers.

I wanted to try to see how different the bread come out between 1 time bulk fermentation and 2 times bulk fermentation.   The author of ” Couple Junkies” mentions that it rises more than 1 time bulk fermentation.   I didn’t see the difference actually.. but I can taste the difference of the taste.  1 time bulk fermentation until tripled — Very soft crumb     2 times bulk fermentation until tripled– chewy crumb  /  When the dough rose only double in bulk on the second time, the crumb was really chewy.. I didn’t like it at all.

This is the loaf that my daughter is pleased with finally.

Sesame bread ( Goma shokupan)

* This bread tastes better 2 days after baking because the crumb might be too chewy at the first day.

My  Pullman size:23cmx10cmx10cm

Ingredients:

Bread flour ( King Arthur)  400g

Levain              120g  ( 60g King Arthur All purpose flour / 60g  raisin yeast water )  mix and rest at 74-76F for 12 hours

Sugar        14g

Water      220g  DDT 76F

Salt     7g

Shortening   12g

sesame   black  19g/ white 19g= 38g   ( Toasted  before adding into the dough)

———————-

Method:

1. Mix all the ingredients except the salt and the shortening and the sesame.

If you have a stand mixer, I highly recommend to use this method.

2 Autolyze  30 minutes

3. Add the rest of the ingredients.

4. Knead  until you pass a window pane test.

5. Bulk fermentation:  5-6 hours at 73-76F ( Colder temperature for Winter, Warmer temperature for Summer)

I wait for the dough until tripled in bulk.

6.  Preshape and bench time and  shape:

Please use ” A Standard sandwich loaf” shaping method instead of ” A Mountain sandwich loaf

”  Warning ( I found it out yesterday 2/9/2012 ): The mountain sandwich loaf shape is good for bread with instant yeast that has strong power to resist any shaping.  I don’t recommend to use for levain bread that used natural yeasts that are too slow  to come back out after shaping.
The mountain sandwich loaf  is given a lot of pressure to the dough during the shaping and the dough gets tougher, therefore, the texture is like eating cotton candy ( shredding ) .

9. Bake ( Preheated 410F)    Spray water around the wall in the oven 4 times and  bake for 20 minutes,open the oven and lotate the dough  180 degree and bake more 15 minutes.  Brush some melted butter on the top of the loaf after baking.

Preheated oven↑

* I tested ” Cold oven or cold start”. You can see the result here.   I  usually use ” Cold oven” which starts with 0 F when you bake. It rises very well.  I don’t see any difference of the crumb between a preheated and non preheated oven.

Sesame bread with raisin yeast water/Cold oven

The crumb is like eating cotton candy… Too much shredding for my taste.

——————————————————

When you use instant yeast for this loaf, I will use this straight method:

Bread flour 100%

Instant yeast 0.8-0.9%  ( I always use less amount yeast because I don’t want to smell strong  brewer in bread.)

Sugar 5%

Salt 1.5-1.8% ( As you like)

Water 55%

Shortening or White sesame oil    3%  ( Using shortening will have a great result of rising  than using sesame oil)

White sesame  4.7%  Toasted before adding

Black sesame 4.7%  Toasted before adding

Creative Commons License
Koubo by Akiko is licensed under a Creative Commons Attribution 3.0 Unported License.


Tags: , , , ,

Baguette with preferment

This Baguette with preferment is what I have worked for a couple of years to get perfect crumb. Of course, I care about the taste.   I posted this recipe on TFL before, but I reduced the yeast, and also changed the method for now.

This dough is very sticky because 80% hydration as to 100% flour.   But I really like this crumb, which is very sweet even though I use only flour,water, salt and a bit of yeast.

   I wanted to make a long and round baguette than a long and slender one that I always make because it is easier for me to get the crumb that has a lot of holes.

Here is my recipe “Baguette with preferment

1 baguette ( Approximately 52cm long)

Ingredients:

Preferment (Day 1  At the night before going to bed- Ferment : 12-15 hours )

Less 1/8 tsp    Approximately 0.4 g  Instant dry yeast ( I use Fleischmann’s Bread Machine)

76 g  Water

95 g  King Arthur All purpose flour

Final dough (Day 2)

Less 1/8 tsp    Approximately  0.4 g  Instant dry yeast ( I use Fleischmann’s Bread Machine)

76 g  Water

95 g King Arthur All purpose flour

3.4 g Salt

*Barley malt powder          1 g ( you need the malt if  your flour doesn’t contain barley malted flour)

Method:

1. Preferment (1): Mix the preferment flour and yeast well until incorporated, then add the salt and water. Stir well with a fork. leave it at the room temperature for 2 hours.

2. Preferment (2): Move the preferment in the refrigerator and leave it for overnight.

3. Preferment (3): Next morning:  Check out the dough if it has enough bubbles from the bottom to the top. If it has the bubbles, it is ready to move to next step. If the dough doesn’t have enough bubbles on the dough, Wait until you can see the bubbles all over.       This dough is ready →

* note:  This dough doesn’t rise at this stage, which I am aiming for.

4. Mix the preferment and final dough:  Mix the final dough’s flour and yeast until incorporated. Then mix all the ingredients and knead for 2-5 minutes until you can achieve the dough temperature ( DT)  70 F.

5. Ready to ferment: Put some oil or shortening in the glass bowl and place the dough to ferment.  Cover it with plastic wrap and put a rubber band around the bowl to avoid to get dry around the surface.

6. Bulk fermentation:  Leave the dough at the room temperature around 70F for 1.5-2 hours until you can see some bubbles on the surface, and many bubbles on the bottom .Punch down 2 times every 20 minutes at the first bulk fermentation.

7. Cold bulk fermentation: Leave the dough at the room temperature around 64F  5-6 hours until the dough rises double in bulk.

8. Preshape:  put the dough on the floured wood board very gently. I use a plastic folder that is cut into a rectangle and coated with shortening.

The bottom is face now. Stretch the dough X way to make a rectangle  around 35cm x12cm, 8mm thick using a rolling-pin and your hand.  Fold the dough in a half, but leave 2-3cm extra on the bottom dough

Stretch out the dough until you desire and pat it gently.  This is 52 cm long. Gently pat on the surface  and put a damp towel over the dough.

9. Bench time:  Put a damp towel over the dough and rest for 15 minutes.

10. Shape: Using your finger tips, pat the dough gently… ( I feel like that I can shape the air in the crumb at this time)

Fold the dough in a half and pinch the both sides very tightly.

11.Final proof:  Place the dough in the linen,that is covered with a big plastic bag and proof for 20-30 minutes around 72F.

12. Scoring:

13.Preheated 465F ( I can’t use maximum temperature 500F. I broke the fuze twice before because I bake baguettes too much.)

1) Bake at 465F for 7 minutes with steam ( Sylvia’s steaming method)

2) Take out of the steaming towels and a parchment that was on the baguette, then decrease the temperature to 450F  and bake more 13 minutes.

3) Shut off the oven and open the door a little bit and leave the baguette for 3 minutes in the oven. – I got this idea from David.

 I am happy with today’s baguette, but my dream baguette is still far from this one.    Practice, Practice, Practice……


Submitted to Yeastspotting

Creative Commons License
Koubo by Akiko is licensed under a Creative Commons Attribution 3.0 Unported License.

 
27 Comments

Posted by on December 9, 2011 in Baguette, My recipes


Tags: , , , ,

Preferment baguette with raisin yeast water

I didn’t  make a plan for 82.6%  hydration dough instead of 72-74% hydration’s .. I made a mistake while making the baking schedule. But it turned out pretty well.
Preferment baguette with raisin yeast water
 Kitchen room temperature 72-76F     6/13-15/2011
Hydration 82.6%
  Preferment dough:
  • King Arthur All purpose flour   75g
  • Raisin yeast water                          15g
  • Ice cold water                                  62g (  I use filtered water that  is on my refrigerator in the winter )
————————————
Final dough:
  • King Arthur All purpose flour   75g
  • Ice cold water                                  62g
  • Salt                                                        2.7g
—————————————
Method:
1. Mix the preferment dough  7 hours at 76F until the dough spreads side ways.
2. Put the preferment dough  in the refrigerator. ( I put it in the bag to control the temperature around 14℃) for 3.5 hours.
3. Added the final dough except the salt.
4. Autolyze for 20 minutes.
5. Added the salt and mix for 2 minutes by hand.  DDT 69F
6. Punch down the dough interval 20 minutes x 2  ( punch down the dough, and make a round shape )
7. Refrigerate it for about 36 hours at 9-10℃ until the dough rises doubled in bulk.
8. Preshape and bench time 20 minutes.
9. Shape  Kitchen temperature was 73F.
10. Proof   for 20 minutes at 69.8℃.
11. Bake   7 minutes with steam at 470F/ 13 minutes at 450 minutes after taking out the steaming tools/ Shut off the oven and leave the door open slightly and leave the baguette for 3 minutes.
before shaping
46cm long
  This is the good one.
 This is the bad one.
 High hydration dough makes thin and crispy crust, and also sweet. However, it is very difficult for me to slash on the dough.  I keep trying over and over.
 
6 Comments

Posted by on December 6, 2011 in Baguette, My recipes


Tags: ,